Medieval Lego (Tips and tricks for your LEGO castles)
Castle building and medieval Lego in general is a very popular theme among fans, and is the subject of many mocs. I myself have built many castles, villages, and fortresses from the middle ages. I'd like to show you some of the techniques I've used for my walls, streets, and roofs.
Walls: For walls I usually use this technique = A mix of regular bricks with profile bricks and bricks with bricks printed on them. I also throw in some jumper plates and headlight bricks with 1x2 tiles attached.
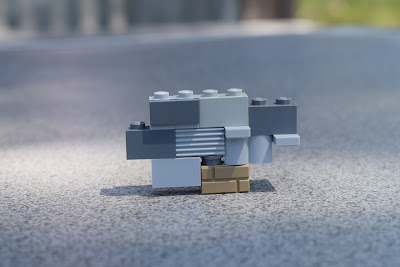
A mix of colors adds a sense of reality to your builds, as shown here where I used grey and brown bricks to build this wall fragment.
To make a curved wall for your towers, I use alternating 1x2 bricks with 1x1 round bricks, which allows you to curve the entire structure.
Next I'll talk about roofs = I like to use two types of roofs for my builds, one which requires many brown chairs, the other a lot of 1x1 sloped bricks.
First, here's how to build the chair version, which I mainly use for stables.

This roof is a fairly simple build. It consists of brown chairs connected by bricks and plates as shown below.

This type of roof I use for the tops of village buildings, because it resembles roof tiles.

Most likely the most popular type of road in medieval times were cobbled roads.

This is just one of many ways to build cobbled roads, the easiest in my opinion, and the outcome even looks similar to the real thing.
Happy building!
Walls: For walls I usually use this technique = A mix of regular bricks with profile bricks and bricks with bricks printed on them. I also throw in some jumper plates and headlight bricks with 1x2 tiles attached.

A mix of colors adds a sense of reality to your builds, as shown here where I used grey and brown bricks to build this wall fragment.
To make a curved wall for your towers, I use alternating 1x2 bricks with 1x1 round bricks, which allows you to curve the entire structure.
 |
| An example of a tower wall not curved... |
 |
| ...and curved. |
Next I'll talk about roofs = I like to use two types of roofs for my builds, one which requires many brown chairs, the other a lot of 1x1 sloped bricks.
First, here's how to build the chair version, which I mainly use for stables.

This roof is a fairly simple build. It consists of brown chairs connected by bricks and plates as shown below.

This type of roof I use for the tops of village buildings, because it resembles roof tiles.

Most likely the most popular type of road in medieval times were cobbled roads.

This is just one of many ways to build cobbled roads, the easiest in my opinion, and the outcome even looks similar to the real thing.
Happy building!


Comments
Post a Comment